Tuesday, February 12, 2013
A different kind of quilting....
I have spent many hours at my machine this week (evident by the very sore muscles in the left side of my neck!), doing a 'different' sort of project. I was asked to make a banner (= quilt to me) for our church for a theme they are following for the year. I was given a rough design. I was more than a little nervous only because I can't draw to save myself, and as it was pictorial, I was concerned about getting the proportions correct. Well, all was going well, then I met with my pastor to show him my 'mock up', but discovered I had my dates wrong (surprise surprise!!), and instead of a 10 day time frame I had 2. Oops!! So, home again home again jiggety jiggety jig I went (but a little faster this time) and hit the machine.
I actually thought I would be able to whip it up pretty quick, BUT, the buttonholing around the lettering was so time consuming! By 12.30 am I had it together but had only outlined the hand, plate and 4 letters. I had to work the next day til lunchtime, then wizzed home (no old man driving for me!) and kept going. I managed to watch an entire series of (12 episodes) of a show just while outlining and quilting. The machine could only go so fast and I estimated I spent about 8 -10 sitting there.
I then had to work again Saturday morning, so darling daughter #1 started to stitch down the binding for me and I finished when I got home from work. So it was finally finished and hanging ready for Sunday service. I was quite pleased about the finished product.
Elsie, who attends the primary school attached to the church was proud when she got home from school yesterday. They had chapel in the morning and she was sitting just near the banner and told me how she told all her friends that her Mum had made it... isnt' that cute?
Have a great week,
Michelle xx
p.s. my tip for the week... stretch! Even though I felt fine while I was sewing (I think there was too much adrenaline to feel anything), I must have knotted everything up and am still paying today. So stretch ladies, stretch!
Tuesday, February 5, 2013
Civil War Miniature
I've been working on this little delight for a little while. I have a huge amount of civil war fabrics left over, from my hexies, so a miniature quilt was a great way to use them up!
As usual, I go flat out, then once that itch has been satisfied, move on to the next 'to be' unfinished project. Well, I quilted this over the wet spell (ok torrential rain and flooding) we had in Brisbane recently, and have just finished binding (while watching 'The Help'.. again... love that movie!!)
I did debate how much quilting to put in. Quick and easy ditch (which I dont' find exactly satisfying) or free motion feathers. I'm glad I went with the feathers, I thoroughly enjoy this while it doubles for well needed therapy. I did need to ditch around the little pieced blocks, and for the first time, I free motioned this to avoiding all the frustrating and neck breaking turning and pulling it requires. It is a lot more time consuming, but again, worth the effort.
This pattern was from 'Civil War Legacies' by Carol Hopkin, and has a finished size of 31" x 36"
Enjoy your week,
Michelle
Tuesday, January 8, 2013
So easily distracted.....
Well.... so there's Zac's quilt which really NEEDS to be done, and then there is new fabric which whispers sweet nothings in my ear........ What's a girls to do I ask??
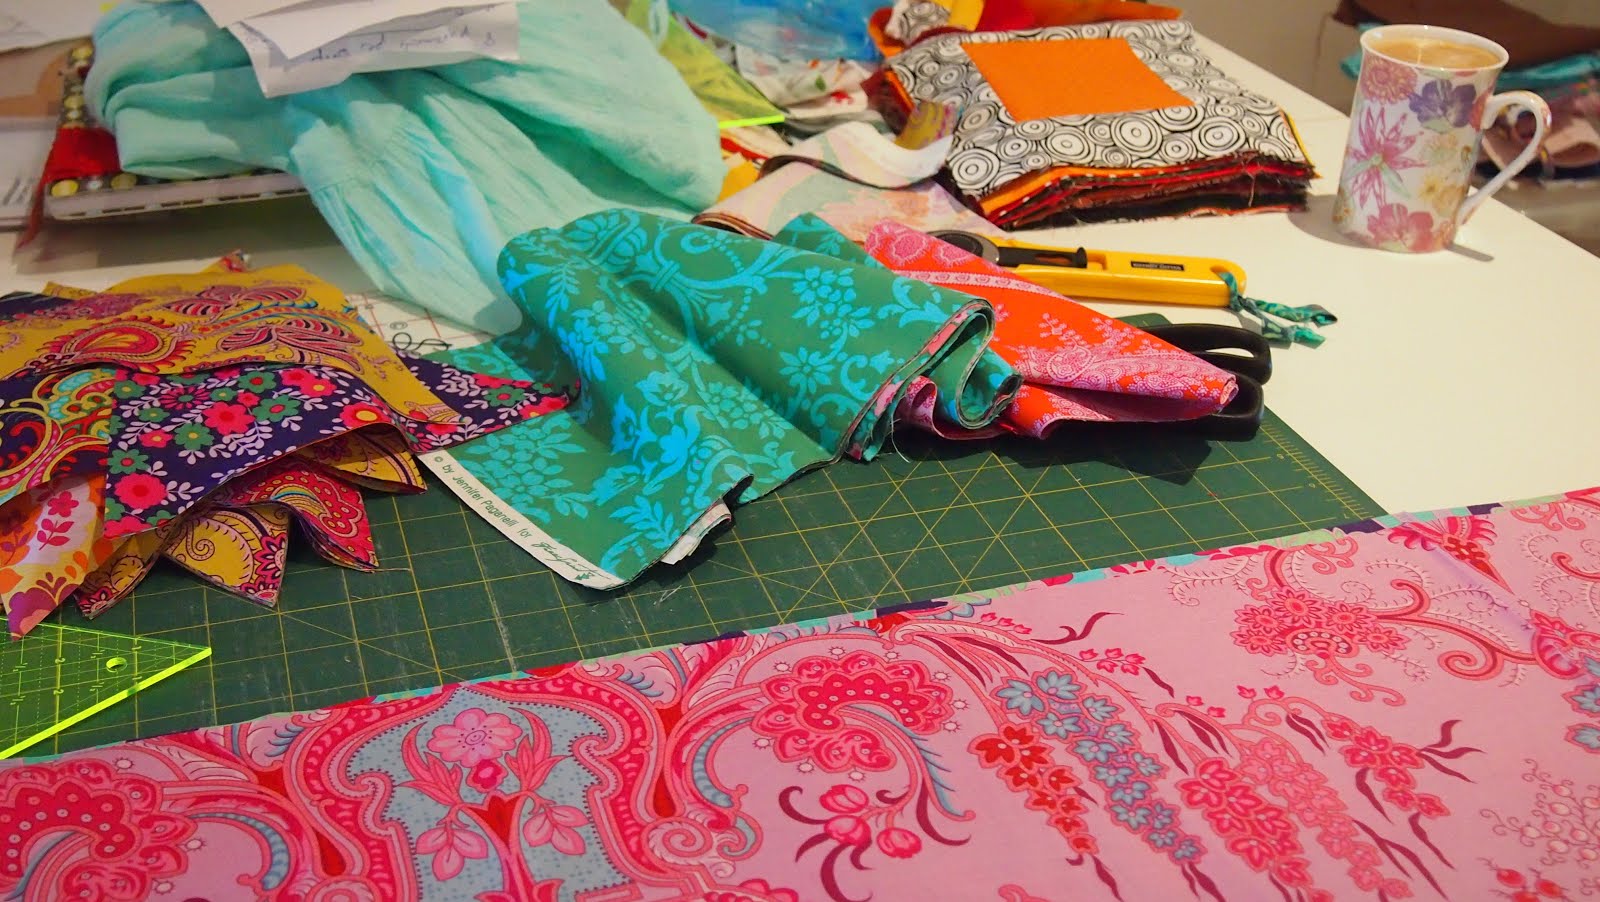
This gorgeous new fabric which I am madly in love with is aptly named... "Crazy Love" by Jennifer Paganelli. I arrived in our humble little shop just before Christmas but I didn't have time to play. Yesterday I found time (ok, MADE time) and cut out an new variation on my Pyramid Parade pattern. Its the same pyramids but with a completely different effect due to fabric placement (I've always loved the way you can make the same pattern so different). Hopefully it will be put together very soon and I can show you... oh yeah... and Zacs.
You can see here Zacs 'square in a square' blocks (NOT square with borders! ;) ) sitting patiently in the top right hand corner, with my new fabrics in the forefront.
Sheesh! Better get a move on!
Squeezes,
Michelle x
This gorgeous new fabric which I am madly in love with is aptly named... "Crazy Love" by Jennifer Paganelli. I arrived in our humble little shop just before Christmas but I didn't have time to play. Yesterday I found time (ok, MADE time) and cut out an new variation on my Pyramid Parade pattern. Its the same pyramids but with a completely different effect due to fabric placement (I've always loved the way you can make the same pattern so different). Hopefully it will be put together very soon and I can show you... oh yeah... and Zacs.
Sheesh! Better get a move on!
Squeezes,
Michelle x
Monday, January 7, 2013
Paris Traveller overnight bag
I love this bag! The pattern belongs to 'Fig Tree Quilts', and it works out just beautifully. This is the third one I have made, and this time I made it using the gorgeous Tilda fabrics (available at the Quilters Corner of course!).
Have a great week,
Michelle xx
Have a great week,
Michelle xx
Tuesday, January 1, 2013
Perfect start to the Year!
I realised as I started cutting a new quilt today that it was in fact (of course!) the best way to spend the first day of the new year. I'm hoping that it is indeed a sign of what is to come.
Now you may look at the photo below and think.... what?? And I agree with you! These are not colours of my choice but they do have a special meaning. Zac is the son of very good friends of ours and in a couple of weeks he fly's the nest. He has been accepted into the Australian Defence Force Academy in Canberra as an intelligence officer with the Royal Australian Air Force (near and dear to my husband and I as we met when we were both in the RAAF). So! I needed a special present, and of course and I didn't need to think too long.
I am doing a very basic 'square in a square' quilt, which is never fail, quick, masculine quilt. Our Zac is a mad keen soccer (sorry! 'football') fan (nut), so these colours represent his favourite teams. The green and gold for Australia, red/orange/black and white for Manchester United, and orange/white black for the Roar (Brisbane). The blocks will then be sashed in black. I will post photos of the finished product.
Before I could even contemplate sewing today however, I needed to tidy my pigsty of a sewing room and actually make a path to the sewing machine. My sewing room still isn't ideal, but I do have a sewing machine on a table (great help... sewing on the floor sucks) and a cutting table actually being used for its intended purpose (a treat indeed!).
So without further adieu (to you and you and youuuuuu..... sorry... 'Sound of music' came into my head), I will make a start on those square in square blocks (although according to a customer the other day, this is completely inaccurate as it is a 'square with borders'... isn't it?? sheesh!... I did try and explain my way of thinking, but she smiled and shook her head, so I bit my tongue!)
Squeezes,
Michelle xx
p.s. I'm very proud of myself as I have blogged every day so far this year, quite an achievement!
Thursday, December 27, 2012
Christmas 2012
I hope you all had a wonderful Christmas! Mine certainly has been as I've been surrounded by family and friends, with some more very welcome visits still to come.
I didn't get any sewing done, but for the first time in years I did manage to do some traditional Christmas goodie baking, which was very rewarding. And my nieces and nephews now tell me that 'my' rocky road (secret recipe courtesy of my sister) has now taken over the number one position from 'jelly slice'!
I was lucky enough to be spoilt with a very nice new camera. I have been frustrated with the quality of my old one for a while, especially when trying to photograph detail in quilts, so I'm hoping to bring you lots of lovely pics this year. Of course it is not all down to the camera, the person behind it has just a little to do with it also, so I'm thinking a little course might also be on the cards!
Speaking with on the cards..... so is lots of quilting!! I can't wait. I can't wait to get my hands on some fabric and let my creative juices flow. And I wish the same for you.. may your 2013 be filled with many blessings, not the least being time to create...
Much love,
Michelle xx
Thursday, November 8, 2012
Binding Tutorial
I did promise to get back to you with my binding method...
I also contemplated doing a video tutorial but that would involve you (and worse still... ME!), listening to my voice, and I just couldn't cope with that just yet!
So, I use a 2.5" strip for binding (unless using flannel in which case I use 3"). It needs to be the length of the perimeter (outside edge) of the quilt, plus a minimum of 15" (40cm). It needs to be continuous and ironed in half lenghtwise.
Pick a starting point (I usually pick a side, about 2/3 the way down). Leave a tail of at least 8" (this gives a little wriggle room at the end), and on the right side of quilt, match raw edge of binding with the raw edge of quilt. Pin from here down to the first corner.
I stitch about a 3/8" seam allowance (1/4" is too narrow and will leave your binding too thin, 1/2" will be too thick and when you pull your binding over to the back to hand stitch down, it will not cover your stitch line.
Stop 3/8" from the corner, you can reverse here, then take out from the machine. Turn your quilt as if you are about to sew down the next side (which, oddly, you are!).
Fold your binding up, so the raw edges from your binding are in line with the raw edges of your quilt.
Now fold again downwards, so that raw edges are aligned on the side and the 'fold' of the corner is in line with your raw edges on the previous side.
You can now sew down this side (right from the top) until you get to 3/8" from the corner. Repeat all corners the same way.
When you are on your final side, stop, and leave a gap of no less than 8" from where you started.
Now for the fun bit!
You have two tails. Cut one tail so it is just over half way (make sure it is a straight cut and at 90degrees).
Lay the other tail on top, and measure on overlap of exactly(!!) 2.5". And cut (eek!! ... make sure you have this right).
Now, join the two ends on a diagonal by placing them at right angles (as you do your binding strips).
Before you cut off the seam allowance, pull out and make sure it sit flat, which it should do perfectly of course (that's because you're an expert now!!), then trim off, sew the binding down to the final gap and your done... well.... except for hand sewing in down on the other side of course!
when I pin my binding down , I tend to do so only one section at a time, otherwise as I manoevre my quilt, it pricks me, causing me to say less than savoury words (I have no control of course.. especially since binding often involves a glass of wine!). It is a simple blind stitch, taking care to travel your thread within the layers so as not to be visible. Fold the corners neatly, like you would wrap a present.
Incidentally this is actually one of my favourite parts of quilt making, sewing down the binding. To me, you have put a lot of love, time and effort... perhaps passion (and maybe even a tad of blood sweat and lot of tears) into this quilt, and now this is it. The 'piece de resistance', or as I like to say the 'icing on the cake'! I find it completely satisfying, if not a tad time consuming (especially when I have to stop to pat myself on the back regularly!)
So sit back and enjoy crossing the finishing line!
Michelle xxx
p.s. It might amuse you to know that I had almost finished sewing the binding down and taken most of the photos, when I noticed that I had sewn it to the back of the quilt... arrrghhhh (more unsavoury words!!). Another lesson.. when you aren't feeling well and dosed up on cold and flu tablets, perhaps it is best to leave sewing til another time! (this is why, if you are really observant, you will notice a difference in fabric on the border.. its because in some photos, its actually the back!)
I also contemplated doing a video tutorial but that would involve you (and worse still... ME!), listening to my voice, and I just couldn't cope with that just yet!
So, I use a 2.5" strip for binding (unless using flannel in which case I use 3"). It needs to be the length of the perimeter (outside edge) of the quilt, plus a minimum of 15" (40cm). It needs to be continuous and ironed in half lenghtwise.
Pick a starting point (I usually pick a side, about 2/3 the way down). Leave a tail of at least 8" (this gives a little wriggle room at the end), and on the right side of quilt, match raw edge of binding with the raw edge of quilt. Pin from here down to the first corner.
I stitch about a 3/8" seam allowance (1/4" is too narrow and will leave your binding too thin, 1/2" will be too thick and when you pull your binding over to the back to hand stitch down, it will not cover your stitch line.
Stop 3/8" from the corner, you can reverse here, then take out from the machine. Turn your quilt as if you are about to sew down the next side (which, oddly, you are!).
Fold your binding up, so the raw edges from your binding are in line with the raw edges of your quilt.
Now fold again downwards, so that raw edges are aligned on the side and the 'fold' of the corner is in line with your raw edges on the previous side.
When you are on your final side, stop, and leave a gap of no less than 8" from where you started.
Now for the fun bit!
You have two tails. Cut one tail so it is just over half way (make sure it is a straight cut and at 90degrees).
Lay the other tail on top, and measure on overlap of exactly(!!) 2.5". And cut (eek!! ... make sure you have this right).
Now, join the two ends on a diagonal by placing them at right angles (as you do your binding strips).
Before you cut off the seam allowance, pull out and make sure it sit flat, which it should do perfectly of course (that's because you're an expert now!!), then trim off, sew the binding down to the final gap and your done... well.... except for hand sewing in down on the other side of course!
Incidentally this is actually one of my favourite parts of quilt making, sewing down the binding. To me, you have put a lot of love, time and effort... perhaps passion (and maybe even a tad of blood sweat and lot of tears) into this quilt, and now this is it. The 'piece de resistance', or as I like to say the 'icing on the cake'! I find it completely satisfying, if not a tad time consuming (especially when I have to stop to pat myself on the back regularly!)
So sit back and enjoy crossing the finishing line!
Michelle xxx
p.s. It might amuse you to know that I had almost finished sewing the binding down and taken most of the photos, when I noticed that I had sewn it to the back of the quilt... arrrghhhh (more unsavoury words!!). Another lesson.. when you aren't feeling well and dosed up on cold and flu tablets, perhaps it is best to leave sewing til another time! (this is why, if you are really observant, you will notice a difference in fabric on the border.. its because in some photos, its actually the back!)
Subscribe to:
Posts (Atom)